
Finally, -after 24h of failed attempts-, I could get my favourite Hugo theme up and running with R Studio and Blogdown.
All the steps I followed are detailed in my new Blogdown entry, which is also a GitHub repo. However, there is an updated version of the tutorial here:
After exploring some alternatives, like Shirin’s (with Jekyll), and Amber Thomas advice (which involved Git skills beyond my basic abilities), I was able to install Yihui’s hugo-lithium-theme in a new repository.
However, I wanted to explore other blog templates, hosted in GiHub, like:
- gcushen/hugo-academic
- jpescador/hugo-future-imperfect and
- kakawait/hugo-tranquilpeak-theme
- Or this one kishaningithub/hugo-creative-portfolio-theme
The three first themes are currently linked in the blogdown documentation as being most simple and easy to set up for unexperienced blog programmers, but I hope the list will grow in the following months. For those who are willing to experiment, the complete list is here.
Finally I chose the hugo-tranquilpeak theme, by Thibaud Leprêtre, for which I mostly followed Tyler Clavelle’s entry on the topic. This approach turned out to be easy and good, given some conditions:
- Contrary to Yihui Xie’s advice, I felt brave enough to choose github.io to host my blog, instead of Netlify (I love my desktop integration with GitHub, so it was interesting for me not to move to another service for my static content).
- In my machine, I installed Blogdown & Hugo using R studio (v 1.1.336).
- In GiHub, it was easier for me to host the blog directly in my main github pages repository (always named [USERNAME].github.io), in the master branch, following Tyler’s tutorial.
- I have basic knowledge of html, css and javascript, so I didn’t mind to tinker around with the theme.
- My custom styles didn’t involve theme rebuilding. At this moment they’re simple cosmetic tricks.
The steps I followed were:
Git & GitHub repos
- Setting a GitHub repo with the name [USERNAME].github.io (in my case aurora-mareviv.github.io). See this and this.
- Create a
gitrepo in your machine:- Create manually a new directory called [USERNAME].github.io.
- Run in the terminal (Windows users have to install git first):
cd /Git/[USERNAME].github.io # your path may be differentgit init # initiates repo in the directorygit remote add origin https://github.com/[USERNAME]/[USERNAME].github.io # connects git local repo to remote Github repogit pull origin master # in case you have LICENSE and Readme.md files in the GitHub repo, they're downloaded - For now, your repo is ready. We will now focus in creating & customising our Blogdown.
RStudio and blogdown
- We will open RStudio (v 1.1.336, development version as of today).
- First, you may need to install Blogdown in R:
install.packages("blogdown")- In RStudio, select the Menu > File > New Project following the lower half of these instructions. The wizard for setting up a Hugo Blogdown project may not be yet available in your RStudio version (not for much longer probably).
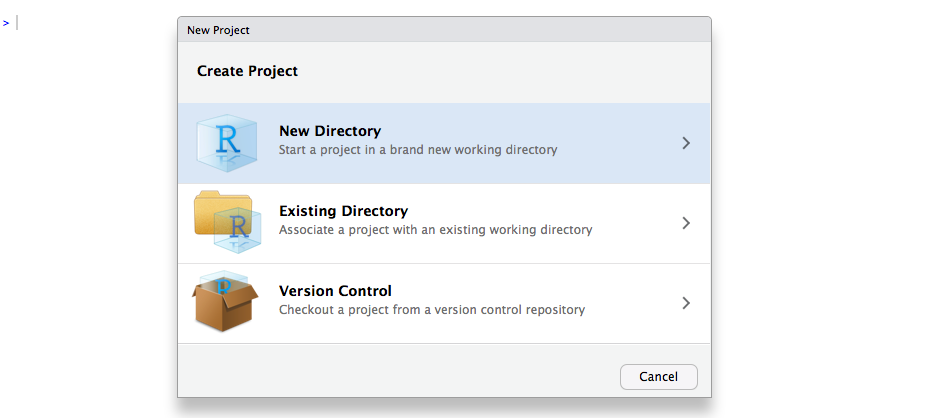
Creating new Project
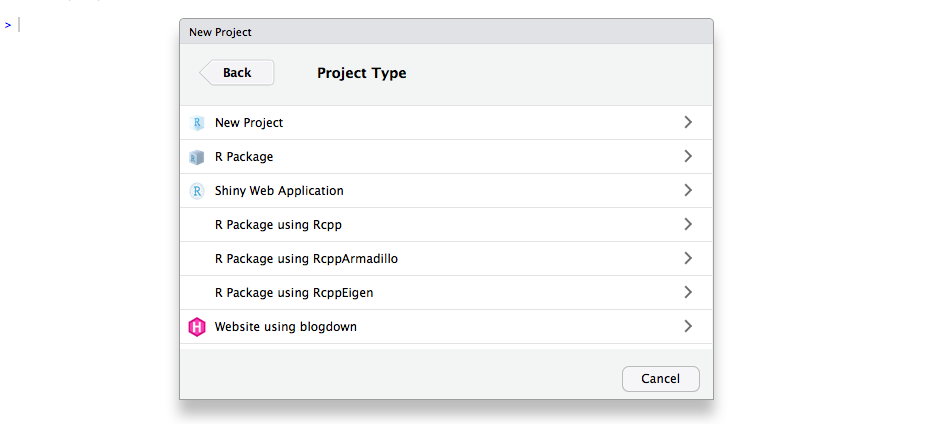
Selecting Hugo Blogdown format
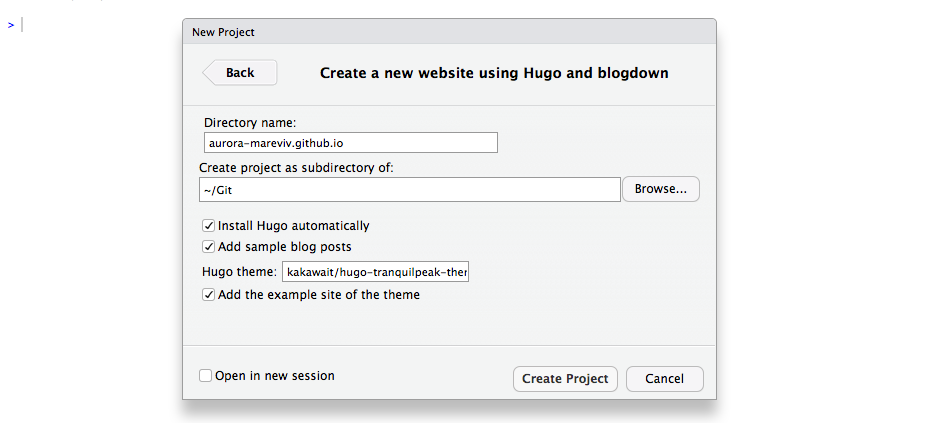
Selecting Hugo Blogdown theme
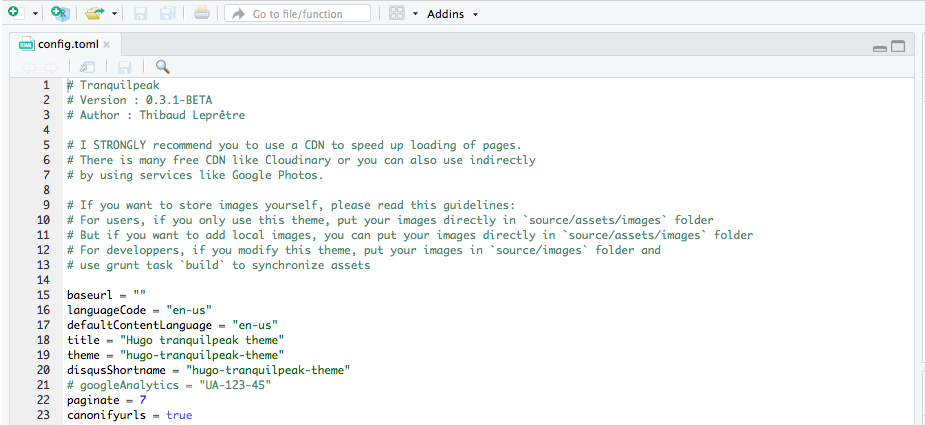
A config.toml file appears
Customising paths and styles
Before we build and serve our site, we need to tweak a couple of things in advance, if we want to smoothly deploy our blog into GitHub pages.
Modify config.toml file
To integrate with GiHub pages, there are the essential modifications at the top of our config.toml file:
- We need to set up the base URL to the “root” of the web page (https://USERNAME.github.io/, in this case)
- By default, the web page is published in the “public” folder. We need it to be published in the root of the repository, to match the structure of the GitHub masterbranch:
baseurl = "/./"
publishDir = "./"
- Other useful global settings:
ignoreFiles = ["\\.Rmd$", "\\.Rmarkdown$", "_files$", "_cache$"]
enableEmoji = true
Images & styling paths
We can revisit the config.toml file to make changes to the default settings.
The logo that appears in the corner must be in the root folder. To modify it in the config.toml:
picture = "logo.png" # the path to the logoThe cover (background) image must be located in /themes/hugo-tranquilpeak-theme/static/images . To modify it in the config.toml:
coverImage = "myimage.jpg"We want some custom css and js. We need to locate them in /static/css and in /static/js respectively.
# Custom CSS. Put here your custom CSS files. They are loaded after the theme CSS;
# they have to be referred from static root. Example
customCSS = ["css/my-style.css"]

# Custom JS. Put here your custom JS files. They are loaded after the theme JS;
# they have to be referred from static root. Example
customJS = ["js/myjs.js"]
Custom css
We can add arbitrary classes to our css file (see below).
Since I started writing in Bootstrap, I miss it a lot. Since this theme already has bootstrap classes, I brought some others I didn’t find in the theme (they’re available for .md files, but currently not for .Rmd)
Here is my custom css file to date:
/* @import url('https://maxcdn.bootstrapcdn.com/bootswatch/3.3.7/cosmo/bootstrap.min.css'); may conflict with default theme*/
@import url('https://fonts.googleapis.com/icon?family=Material+Icons'); /*google icons*/
@import url('https://cdnjs.cloudflare.com/ajax/libs/font-awesome/4.7.0/css/font-awesome.min.css'); /*font awesome icons*/

.input-lg {
  font-size: 30px;
}
.input {
  font-size: 20px;
}
.font-sm {
    font-size: 0.7em;
}
.texttt {
  font-family: monospace;
}
.alert {
padding: 15px;
margin-bottom: 20px;
border: 1px solid transparent;
border-radius: 4px;
}
.alert-success {
color: #3c763d;
background-color: #dff0d8;
border-color: #d6e9c6;
}
.alert-danger,
.alert-error {
  color: #b94a48;
  background-color: #f2dede;
  border-color: #eed3d7;
}
.alert-info {
  color: #3a87ad;
  background-color: #d9edf7;
  border-color: #bce8f1;
}
.alert-gray {
  background-color: #f2f3f2;
  border-color: #f2f3f2;
}

/*style for printing*/
@media print {
    .noPrint {
       display:none;
   }
    }

/*link formatting*/
a:link {
    color: #478ca7;
    text-decoration: none;
}
a:visited {
    color: #478ca7;
    text-decoration: none;
}
a:hover {
    color: #82b5c9;
    text-decoration: none;
}
Also, we have font-awesome icons!
Site build with blogdown
Once we have ready our theme, we can add some content, modifying or deleting the various examples we will find in /content/post .
We need to make use of Blogdown & Hugo to compile our .Rmd file and create our html post:
blogdown::build_site()
blogdown::serve_site()
In the viewer, at the right side of the IDE you can examine the resulting html and see if something didn’t go OK.
Deploying the site
Updating the local git repository
This can be done with simple git commands:
cd /Git/[USERNAME].github.io # your path to the repo may be different
git add . # indexes all files that wil be added to the local repo
git commit -m "Starting my Hugo blog" # adds all files to the local repo, with a commit message
Pushing to GitHub
git push origin master # we push the changes from the local git repo to the remote repo (GitHub repo)Just go to the page https://USERNAME.github.io and enjoy your blog!
R code
Works just the same as in Rmarkdown. R code is compiled into an html and published as static web content in few steps. Welcome to the era of reproducible blogging!
The figure 1 uses the ggplot2 library:
library(ggplot2)
ggplot(diamonds, aes(x=carat, y=price, color=clarity)) + geom_point()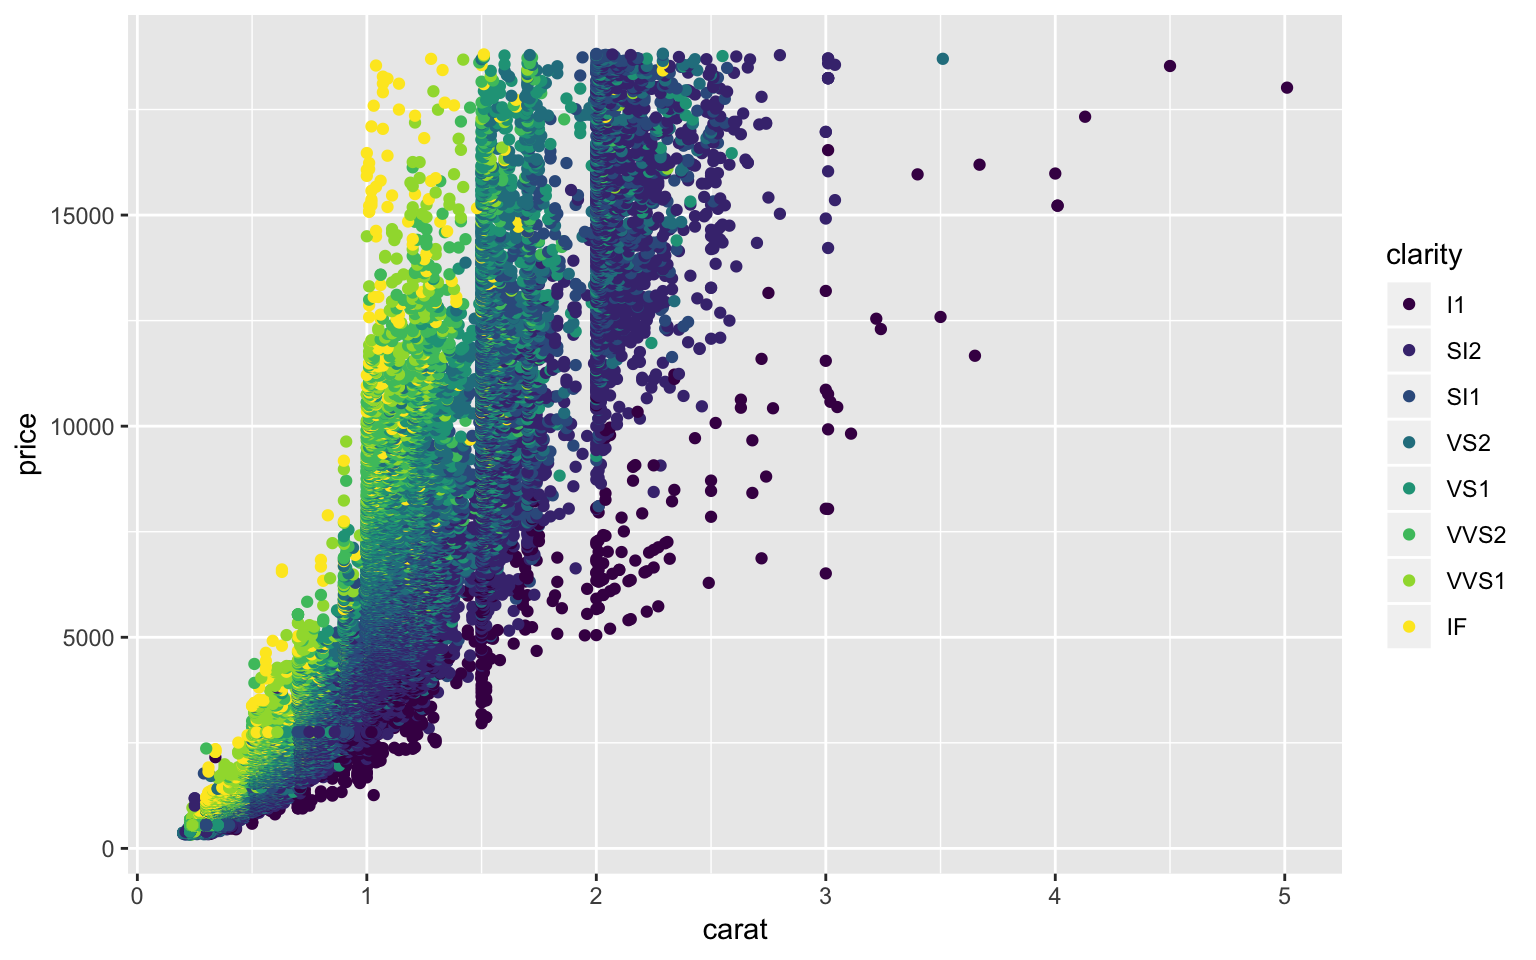
Figure 1: diamonds plot with ggplot2.
Rmd source code
You can download it from here
I, for one, welcome the new era of reproducible blogging!
Updated tutorial
I updated (& hopefully improved) this tutorial, which you can check here.


Wow, finally someone that has experienced the same inconsistency of multiple authors «create in 10 minutes», shall try your solution today hoping to get the Hugo Academic theme deployed.
Did it finally work?
There is an updated version of the tutorial here:
Hello, am trying to combine the many instructions and create an exhaustive and concise paper in an RMarkdown document with Bookdown. Thank you for your reply, shall view the link you shared.
Also, Netlify has a beta version of Netlify Dev that also has version control, exploring that today then shall explore your revised tutorial. Thank you, really appreciate the reply, as I must become a master at using R, RMarkdown and Bookdown and become a JamStack full stack developer.
Good luck then! 👍
I will follow your tutorial right now. May I post comments here regarding my experience?
Yes! just let me know if there’s anything I can improve in the tutorial.
It is true that currently the main choice for Hugo blogs is Netlify, not GitHub. However, I don’t have much time now to change to that platform, and I am still comfortable using GitHub pages!
I recommend better the Blogdown version of the post, which demonstrates some javascript and Mathjax snippets:
https://aurora-mareviv.github.io/talesofr/2018/02/r-blogdown-setup-in-github-2/
Ok, you have a blogdown version of this same tutorial? Just viewed it, gorgeous! Shall post comments from there from this point on.
NOTE: You did not mention installing Git or NPM and GitHub has a Desktop Setup application. Also, I believe Netlify synchronizes with GitHub. Shall post notes on that when I get to that point.
Thank you.